Avatary Studio: Difference between revisions
| Line 74: | Line 74: | ||
'''Note:''' During the entire usage process, when you don't need to operate the Avatary Studio plugin within the DCC software, '''never close it directly'''. Instead, '''minimize it''' to the taskbar. This way, you can ensure the connection remains stable, avoid unnecessary repeated connection operations, and enhance your work efficiency. | '''Note:''' During the entire usage process, when you don't need to operate the Avatary Studio plugin within the DCC software, '''never close it directly'''. Instead, '''minimize it''' to the taskbar. This way, you can ensure the connection remains stable, avoid unnecessary repeated connection operations, and enhance your work efficiency. | ||
[[ | [[File:Avatary_Studio_Open_Connect_DCC.png|center|frameless|1440x1440px]] | ||
[[File:Avatary Studio Maya Start Connect Server.png|center|frameless|1557x1557px]] | [[File:Avatary Studio Maya Start Connect Server.png|center|frameless|1557x1557px]] | ||
Revision as of 07:31, 17 December 2024

Avatary Studio is a new generation of high-precision facial expression post-processing software that can convert facial expression videos shot by any camera into high-quality 3D facial expression animations and supports any 3D facial expression rigging system. The high-precision facial expression animations calculated by Avatary Studio can be exported to mainstream DCC (digital content creation) software such as Maya, 3ds Max, Blender, Unreal, Unity and MotionBuilder.
DOWNLOAD NOW!!!
Avatary Studio, with its unique ingenuity, spares no effort to safeguard your asset security!
It pioneers an architecture that separates computing nodes from assets, completely eliminating
the hassle of asset migration and firmly protecting every piece of digital asset.
Currently supported DCC versions:
- Maya 2020
- Maya 2022
- Maya 2023
- 3Ds Max 2022
TODO List:
- MotionBuilder
- UE
- Unity
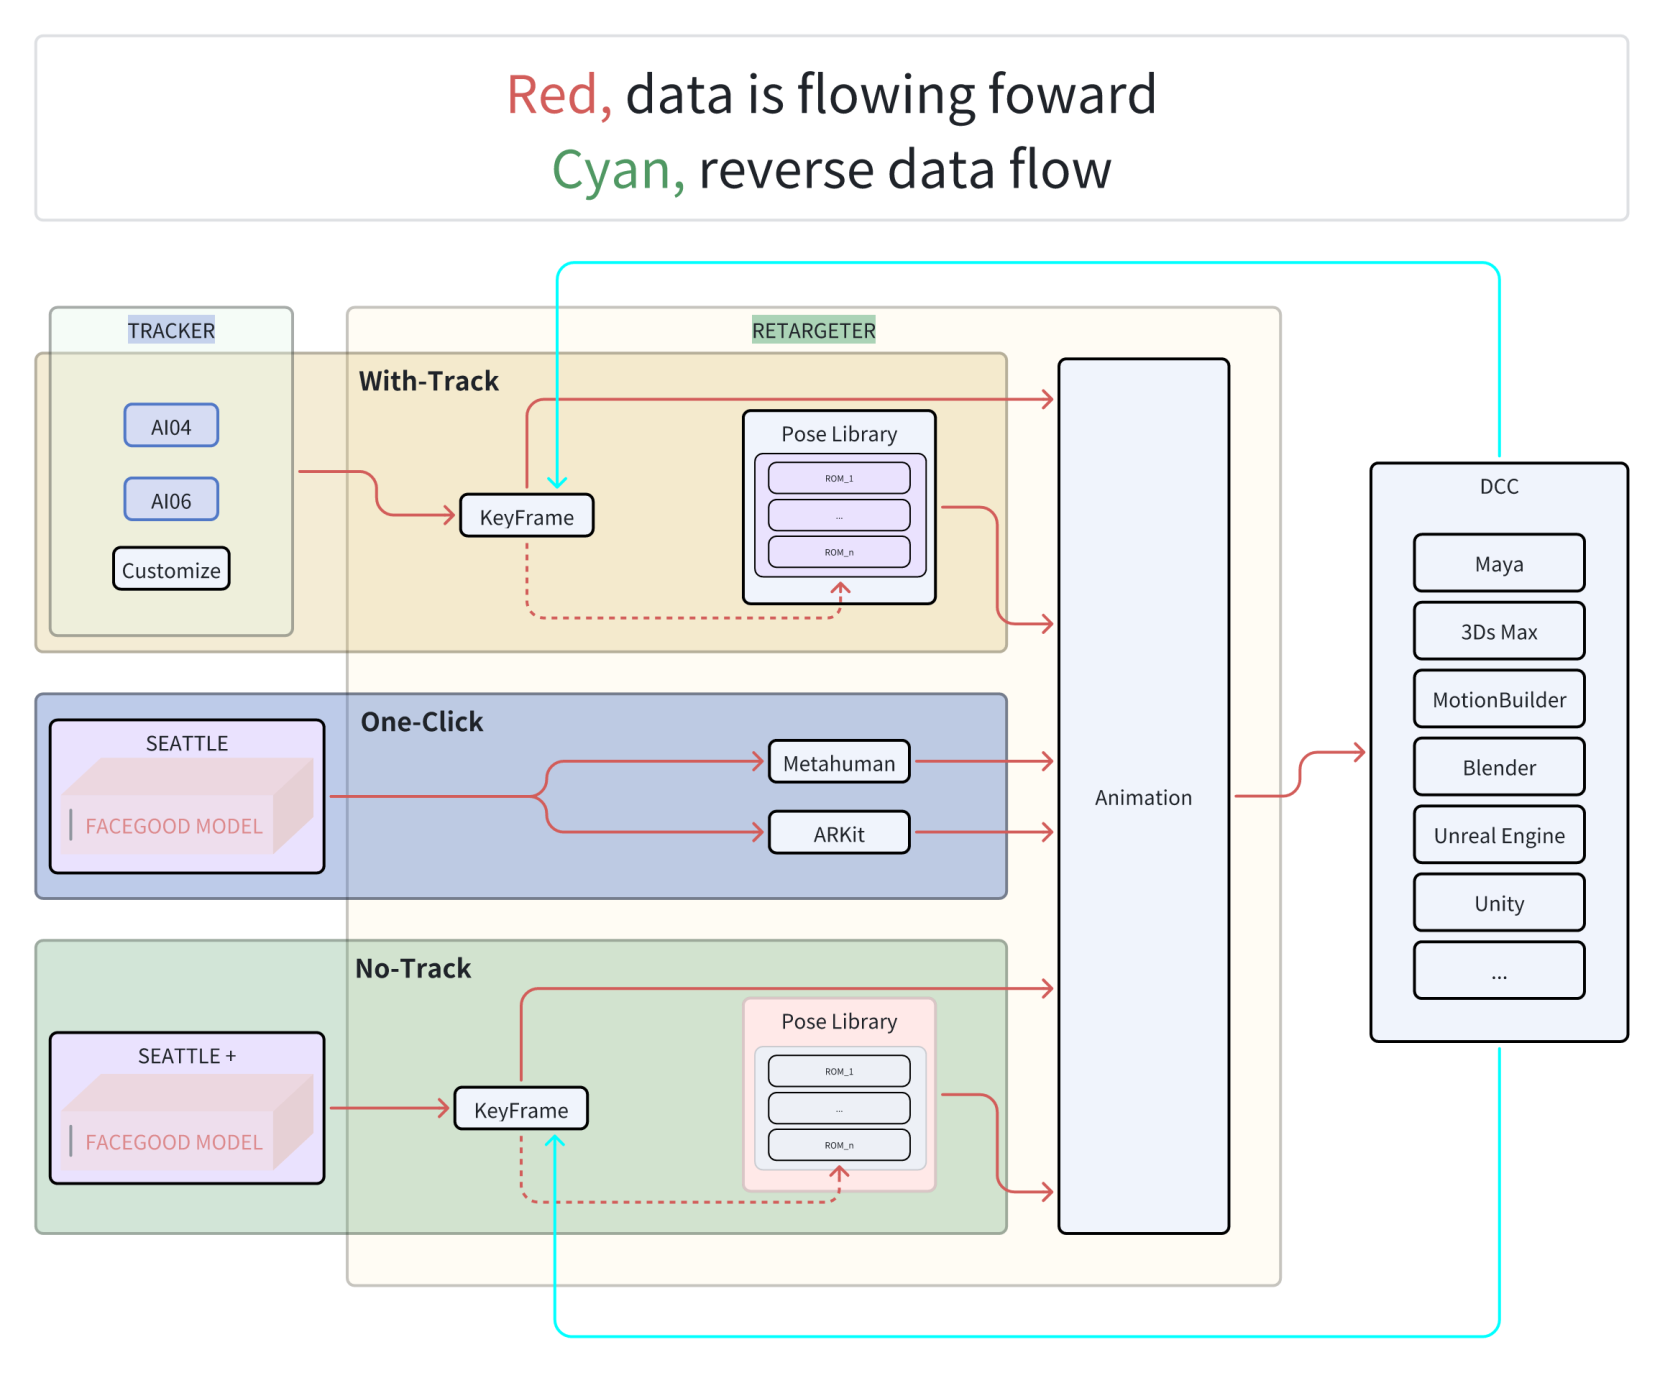
Quick Intro
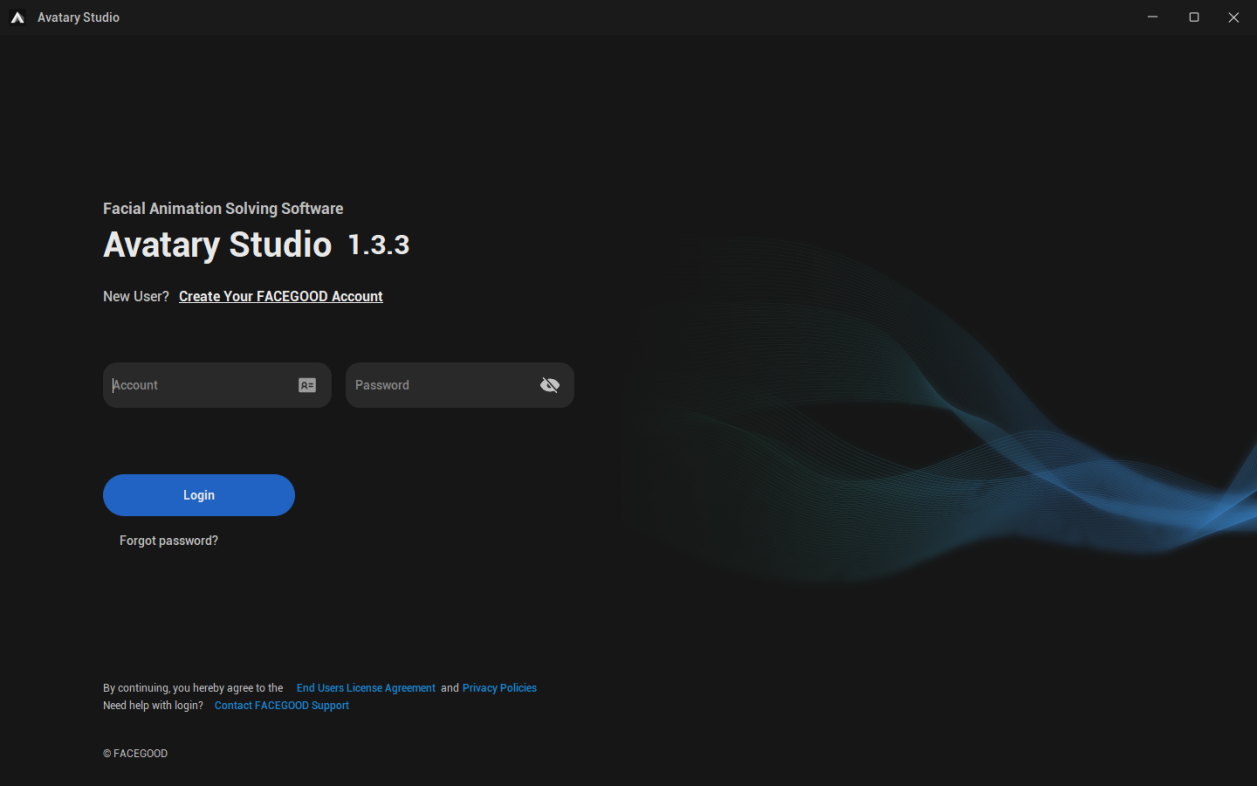
Log in to Avatary Studio
- Open Avatary Studio and enter your account to log in at the login screen
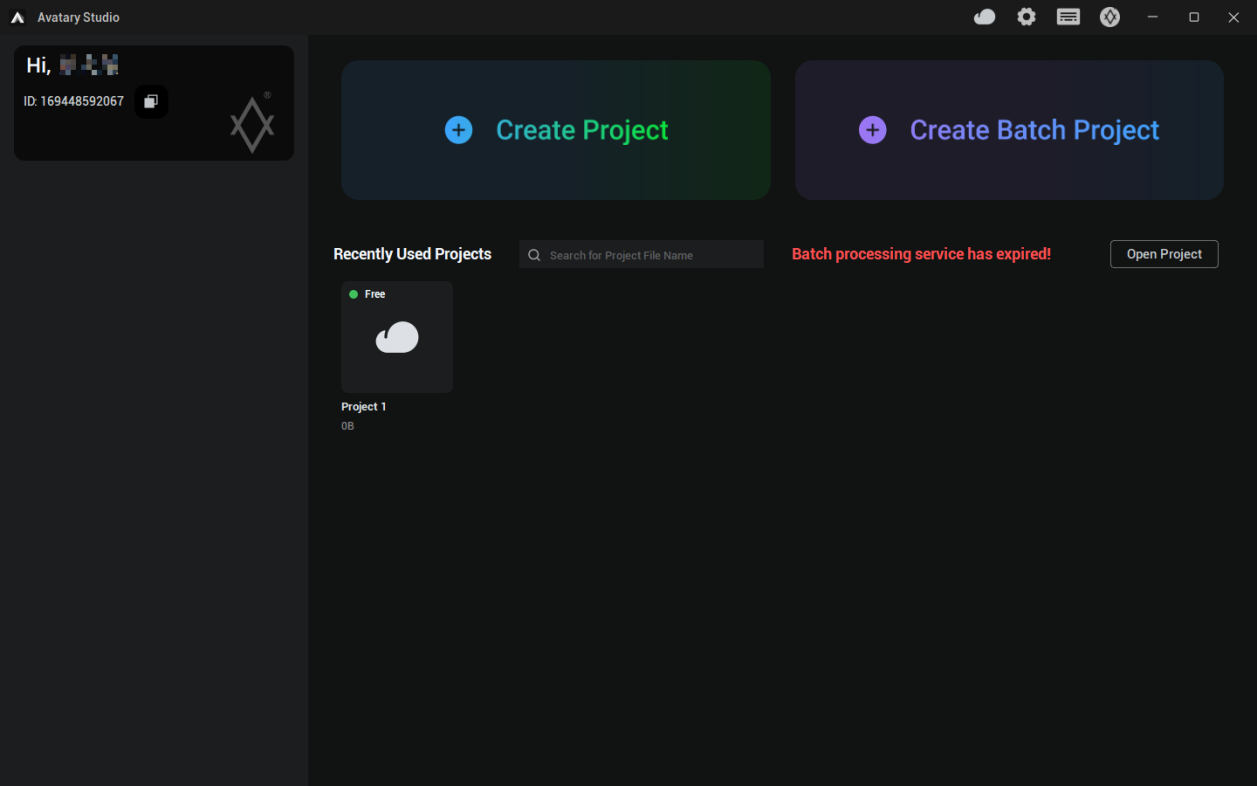
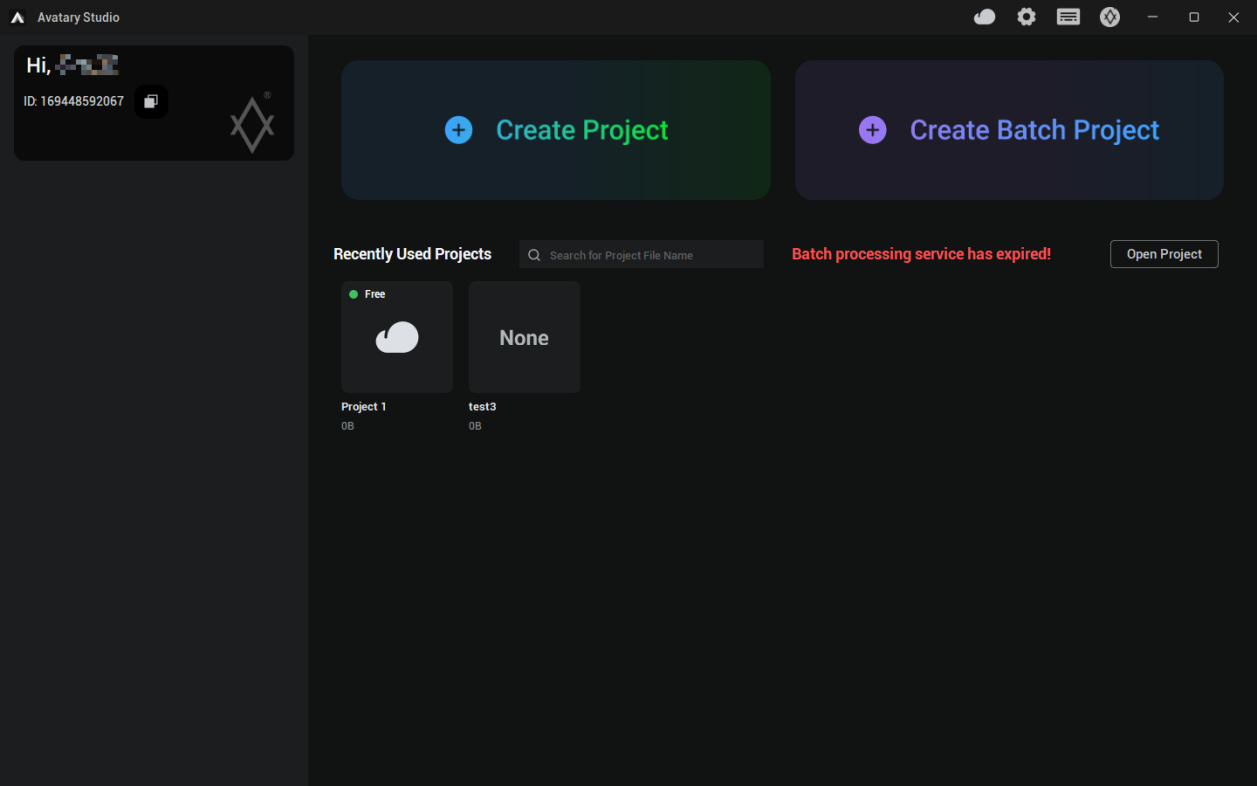
Create new local project
- Locate and click the "Create Project" button to initiate the project creation process. This button is usually prominently placed on the software interface for your easy access.
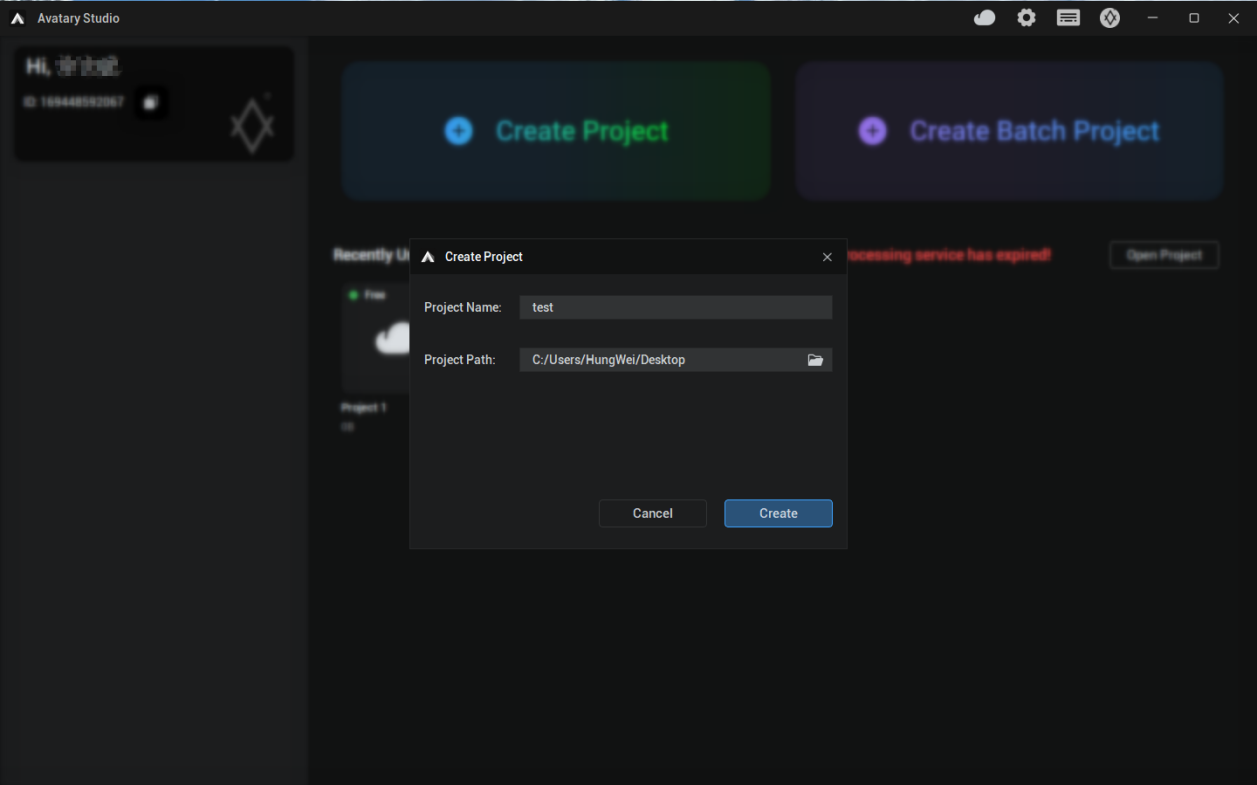
- In the pop-up dialog box, accurately enter the project path, that is, specify the exact location where you want to store the project files. Then enter a unique project name. Once you've finished inputting, click the "Create" button.
NOTE: At this point, the system will automatically create a dedicated folder named after the project name under the specified project path, which is used to store various data and files related to this project, ensuring orderly management of project resources.
- After the project is successfully created, you can simply switch to the "Recently Used Projects" list area and immediately find the newly created project, allowing you to quickly start subsequent project operations and seamlessly connect to the workflow.
Import video to project
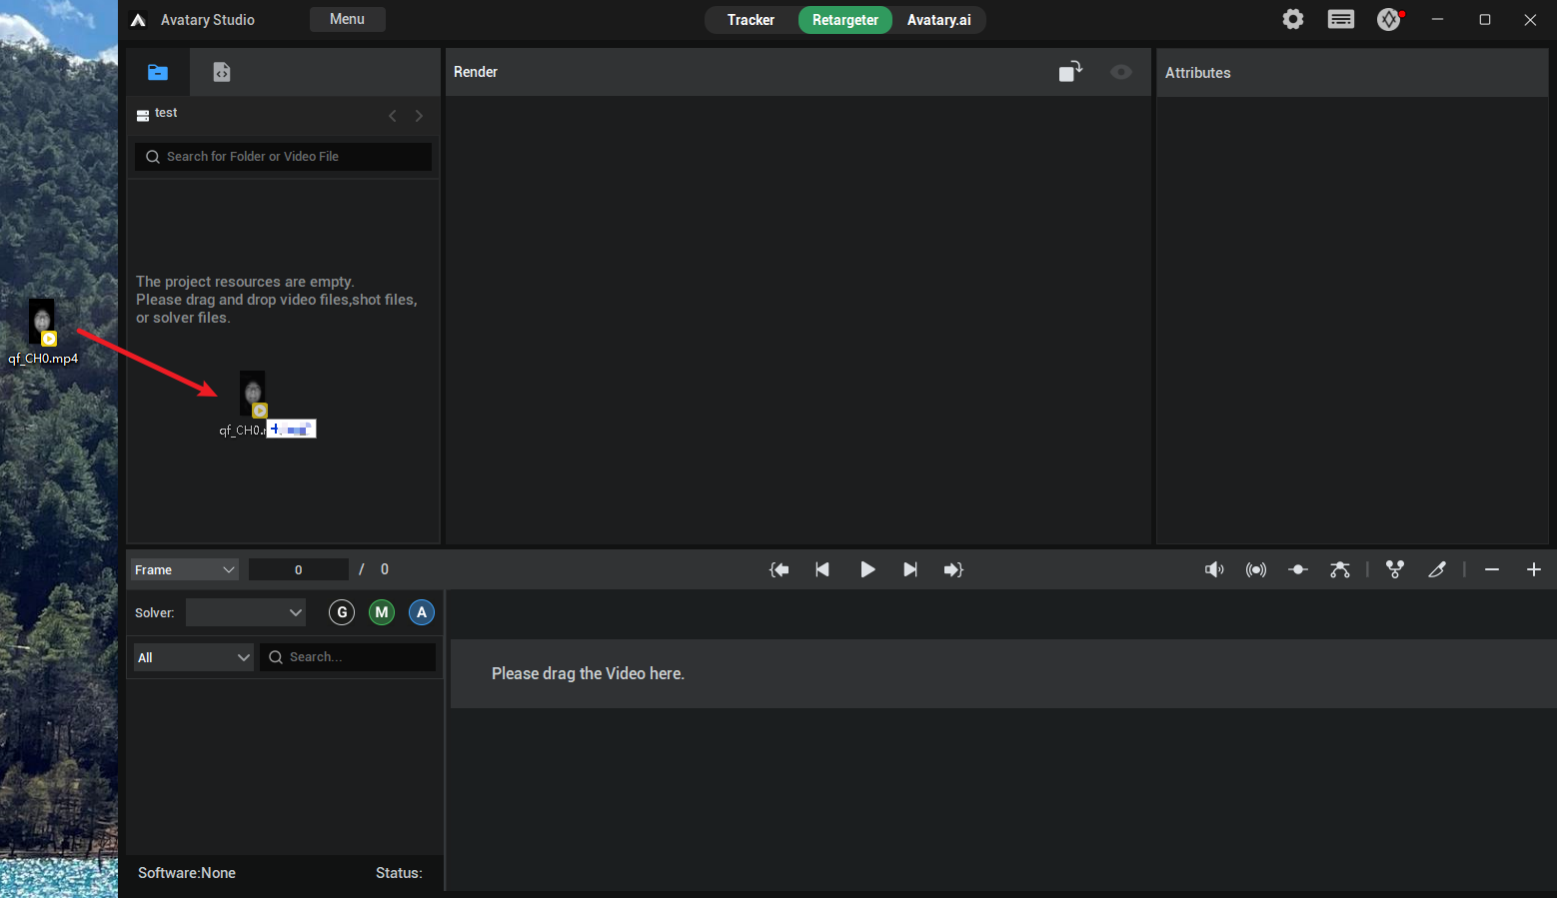
- If you want to import video files, simply drag the video directly into the resource manager.
NOTE: Please note that currently the system only supports video files in .mov and .mp4 formats. If the format of the video you selected does not match, the dragging operation cannot be completed. Please confirm whether the video format is correct in advance.
Connect to DCC
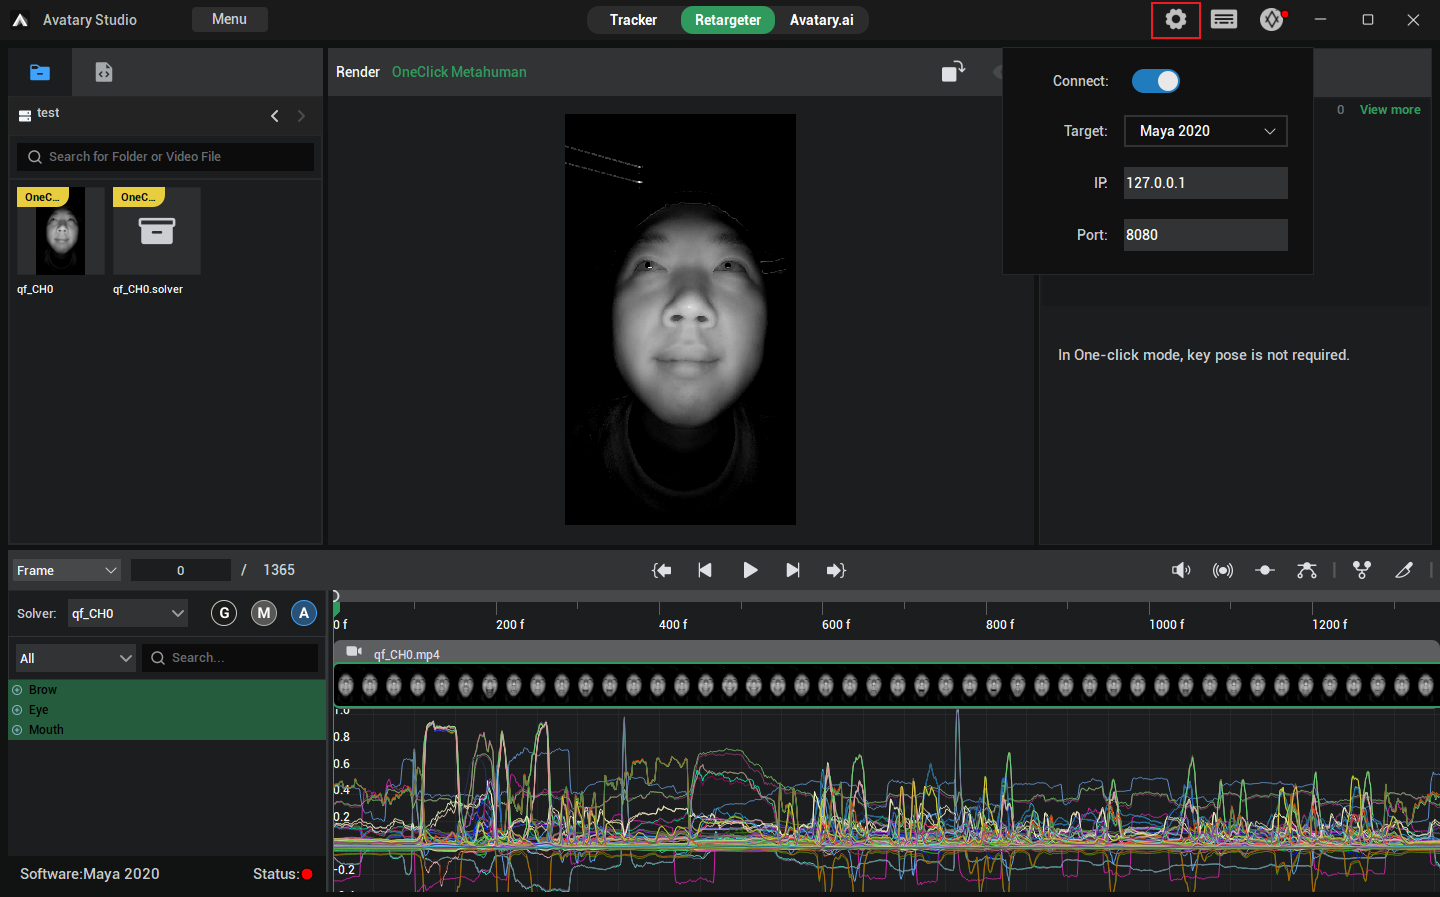
- Embark on the connection journey by first locating the prominent settings button on the Avatary Studio interface, which is in the shape of a gear, and click it gently.
- Subsequently, in the "Target" item column of the pop-up settings menu, carefully select the installed and supported version of the DCC software.
- Then, toggle the "Connect" button to the on state, getting ready for the subsequent docking.
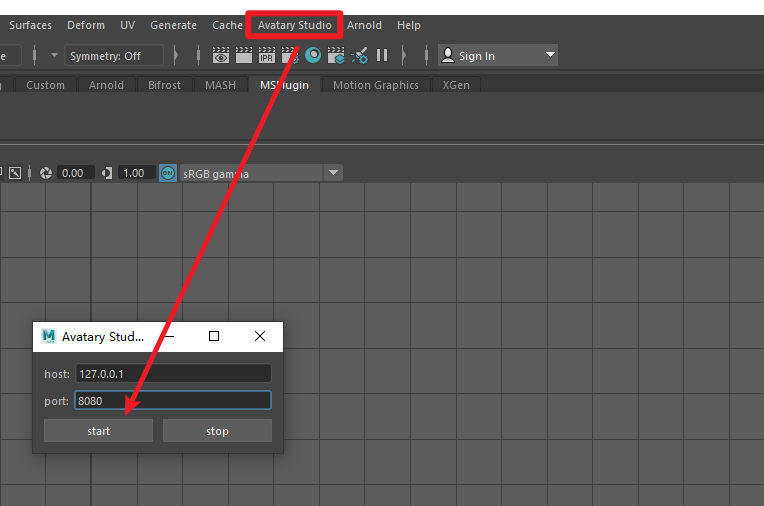
- After completing the first step, open the corresponding DCC software. At this moment, simply shift your gaze to the menu bar area of this software, and you will find the dedicated Avatary Studio plugin listed there. Click to open this plugin and then further locate and click the "start" button to activate the preliminary communication link between the software.
- Wait patiently for a while and closely watch the "Status" indicator light at the bottom left corner of Avatary Studio. Once it changes smoothly from the conspicuous red to the refreshing green, it means that you have successfully established the connection between the two. Congratulations!
Note: During the entire usage process, when you don't need to operate the Avatary Studio plugin within the DCC software, never close it directly. Instead, minimize it to the taskbar. This way, you can ensure the connection remains stable, avoid unnecessary repeated connection operations, and enhance your work efficiency.
Solver Mode
With-Track
Video Tutorial
No-Track
Video Tutorial
One-Click
Video Tutorial
Cloud Batch Solver
Video Tutorial
FAQ
The software cannot be opened.
Install the vc_redist.x64.exe program in the installation directory of Avatary Studio.
The calculation cannot be carried out in Avatary Studio, or the software crashes during the calculation process.
Please install CUDA 11.8.
The Avatary Studio plugins cannot be found in the DCC.
Please check whether the installation directory of DCC in the registry is correct.
That is, go to the following location in the registry: HKEY_LOCAL_MACHINE\SOFTWARE\Autodesk\VaultQualified and check the installation directory of the corresponding version of DCC.

How to open the registry?
- Press the "Win + R" key combination. This shortcut will open the "Run" dialog box.
- In the "Run" dialog box, type "regedit" (which is the command for the Registry Editor), and then click the "OK" button or press the Enter key. After that, the Registry Editor will be opened. Its interface is similar to that of the File Explorer. On the left side is the tree structure of registry keys, and on the right side are the specific key values of the selected registry key.